How to take clear photos?
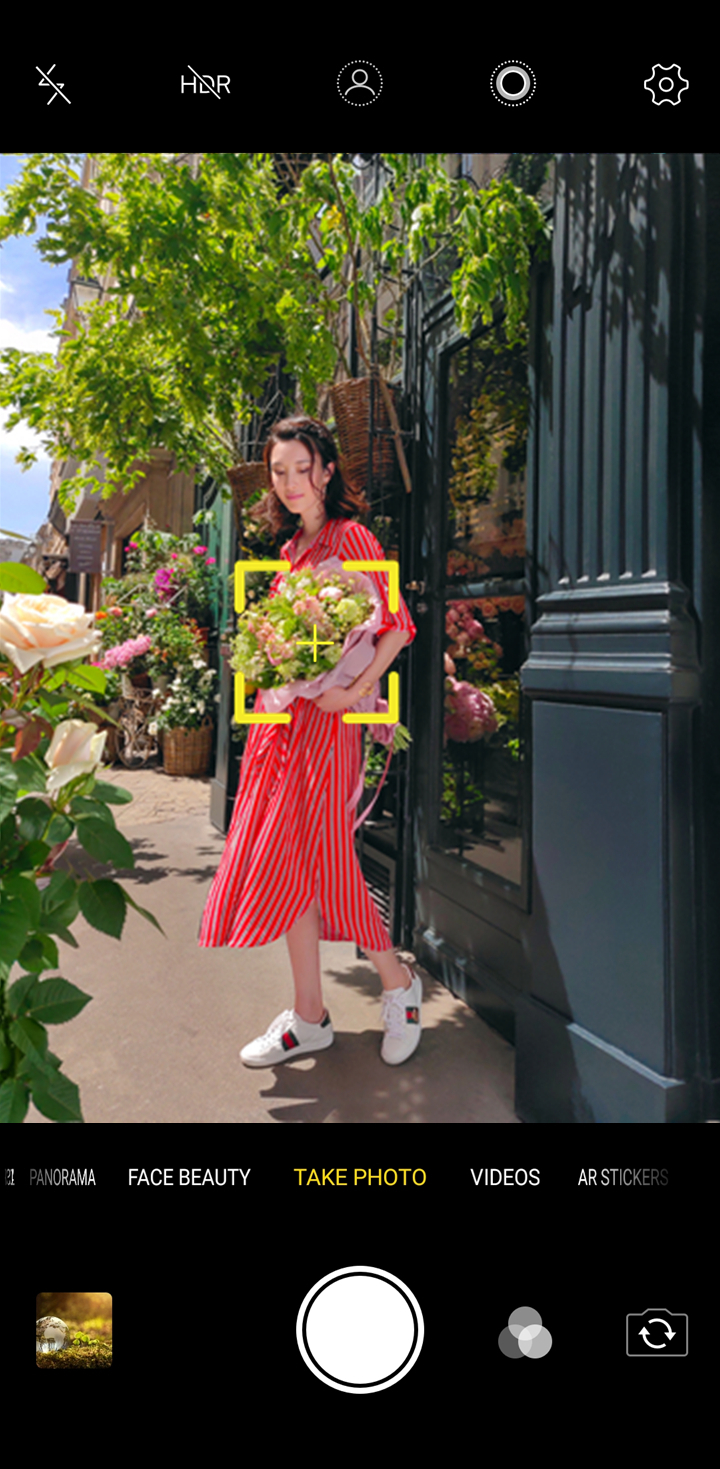
1. Adjust the focus until the picture gets clear when shooting;
2. Try to photograph with sufficient light;

3. Do not shake when you are shooting;
4. In low brightness, use Professional mode(Set S(Shutter speed) as 2-4 seconds) or Night mode(Some phones support it) to take photos. Meanwhile, please keep your phone stable(It is very important).
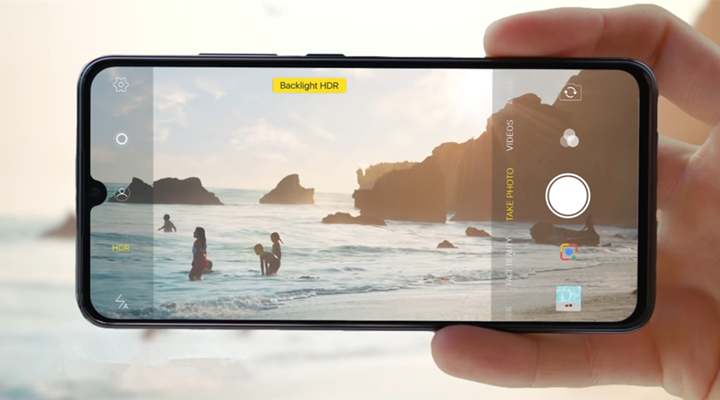
When taking selfies in low brightness, turn on HDR mode(Some phones do not support it);

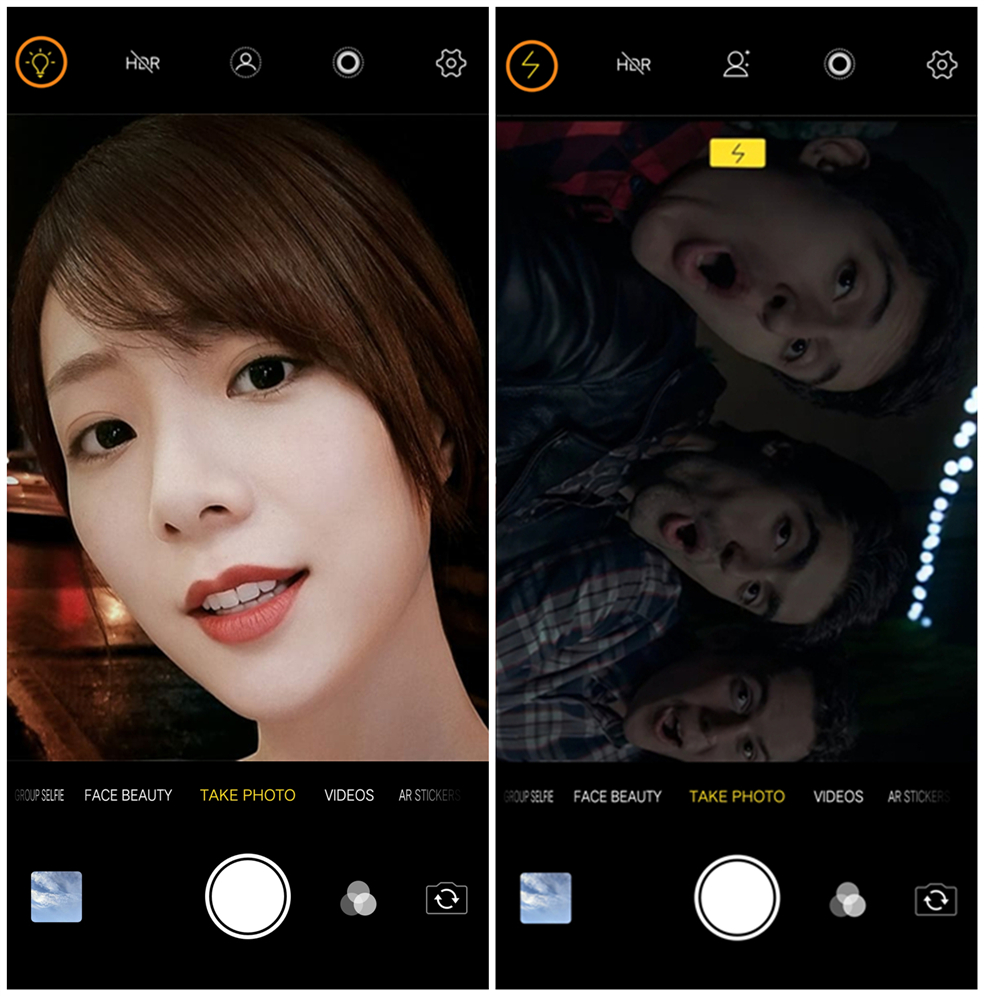
5. In the dark, turn on Selfie Softlight, Smart Screen Flash or rear flash when taking photos;
6. If the objects easily move on, you can go to Professional mode and adjust ISO to the larger value, then touch the Shutter button.

I cannot use Camera. What should I do?
Please don`t worry, perform these steps to solve it:
If you cannot use the built-in Camera:
1. Clear the data of Camera;
2. If you are using an SD card, please remove it, then try to take a photo. If it works, we recommend you change an SD card;
3. Make sure the space of your phone or SD card is sufficient;
4. Updateyour phone to the latest version;
5. Access Settings>More settings>Backup & Reset>Restore(Reset) all settings. Don`t worry, no data or media will be deleted.
If above measures are not effective, please seek help from our Service Center.
If the app cannot access to the camera, please turn on Camera permission of the app to allow it to use Camera.
Why are the pictures I take blurred?
Generally, when the brightness is low, the phone or the objects are moving, it is easy to take the blurred pictures. Don`t worry, you can follow these steps to improve it:
1. Adjust the focus until the picture gets clear when you are shooting;

2. Try to photograph with good lights;
3. Do not shake when you are shooting ;

4. Use Night(Only some phones support it) or Professional mode(Set S(Shutter speed) as 2-8 seconds) to improve the quality and clarity of the picture when the brightness is low. Meanwhile, please keep your phone stable(It is very important);
5. Turn on Smart screen flash, Selfie Softlight(Only some phones support it) or rear flash when taking photos in the dark;

6. If it is hard to keep the objects stable, go to Professional mode>adjust ISO to the larger value, then take a photo for a try(Make sure the ambient light is sufficient).
Why are people in the distance blurred when taking selfies?
Please don`t worry, it is normal. Since the focus of the front camera cannot be adjusted, people in the distance might not be focused. We recommend you and friends try to close to the camera when taking selfies.
Warmly Tips: For the phone with dual front cameras, the focus of the front camera can be adjusted.
What should I do if I cannot focus on the objects when taking photos?
Please don`t worry, it is normal under the below conditions:
1. If the objects are very close to the camera, they cannot be focused on;
2. For the front camera, because the focus cannot be adjusted, when you are away from the front camera, you may not be focused.
If it happens when you try to take photos of the objects within a certain distance, please follow these steps for a try:
1. Enter Camera>switch to rear camera>enter Professional mode>click AF or  >adjust the focus manually to check if the picture can be focused;
2. Try to photograph with good lights. If it is too dark, the camera cannot focus the objects normally;
3. Do not shake when you are shooting;
4. Clear the data of Camera;
5. Upgrade your phone to the latest version;
6. Access Settings>More settings>Backup & Reset>Restore(Reset) all settings. Don`t worry, no data or media will be deleted.
If above measures are not effective, please seek help from our service center.
I cannot click Shutter button to take a photo. What should I do?
Please don`t worry, here are some helpful methods for you:
1. Make sure there is enough available space on SD card or Phone storage;
2. If you are using an SD card, please remove your SD card, then check whether it works. If yes, we recommend you change an SD card;
3. Reboot your phone, then try again;
4. Clear the data of Camera;
5. Upgrade your phone to the latest version;
Access Settings>More settings>Backup & Reset>Restore(Reset) all settings. Don`t worry, no data or media will be deleted.
If above measures are not effective, please seek help from our service center.
How to remove the red eye?
The appearance of red eyes in pictures, known as the “red-eye effect,” occurs when a camera captures light reflecting from the retina at the back of your subject’s eye when a flash is used at night and in dim lighting. It is normal. And here are some methods for you:
1. Don’t look directly at the camera. Tell your subjects to look slightly away from the lens, so their eyes won’t catch the flash at a direct angle. This will reduce the likelihood of red eyes in pictures;
2. Make the room brighter. The darker the environment, the more dilated the subject’s pupils become, which increases the likelihood of red-eye effects in photos. Making the room less dim by turning on more lights can help eliminate red eyes;
3. Download & install the third-party app to remove the red eye. Take PhotoDirector as an example: Enter Photo Director>open the picture>slide left the shortcuts in the bottom>find and touch Portrait Tools>click Red-Eye Removal to remove the red eye.
Why is there much noise on the pictures?
When the brightness is low, in order to improve the identity of the photo, the system will adjust ISO to the higher value. It is well known that ISO value is higher, there is more noise. Furthermore, when the brightness is low, the lighting data which the Image sensor obtains is less, so the quality and clarity of the picture will be reduced.
You can use Professional mode(Set S(Shutter speed) as 2-4 seconds) or Night(Only some phones support it) to improve the quality and clarity of the picture when the brightness is low. Meanwhile, please keep your phone stable(It is very important).

Why is the Shutter button loaded for a while when taking pictures at night?
Please don`t worry, it is normal. In low brightness, Night mode will be activated automatically for better photography experience. When taking photos in Night mode, the camera uses a long shutter speed to capture scene details. That is why the Shutter button is loaded after a while while taking photos at night. You can use your phone with confidence.
Why is there the Ghosting when using HDR mode or Ultra HD mode?
Under HDR mode or Ultra HD mode, the phone takes a few photos and combines them together. If the phone or the objects move during this time, the ghosting phenomenon will appear. To prevent this from happening, try to keep the phone and the objects stable while shooting.
Why does Camera get brighter when I enter?
Please be assured, it is normal. In order to provide good photography experience, when we access Camera, the brightness of Camera will be adjusted to an appropriate level automatically so that the image can get proper exposure. If you feel it too bright, you can slide downward from anywhere to decrease the exposure.
The selfies are in the opposite direction. What should I do?
Please don`t worry, it is a normal photography phenomenon. If you want to get the selfie as you see in Camera, you can enter Camera>switch to Front camera>touch the Settings icon at the upper right corner>turn on Mirrored selfie, then take a selfie for a try.

For Funtouch OS 2.6 and lower version, touch 3 dots icon at the upper right corner, then slide left the shortcuts at the bottom until you find Mirrored selfie, turn it on.
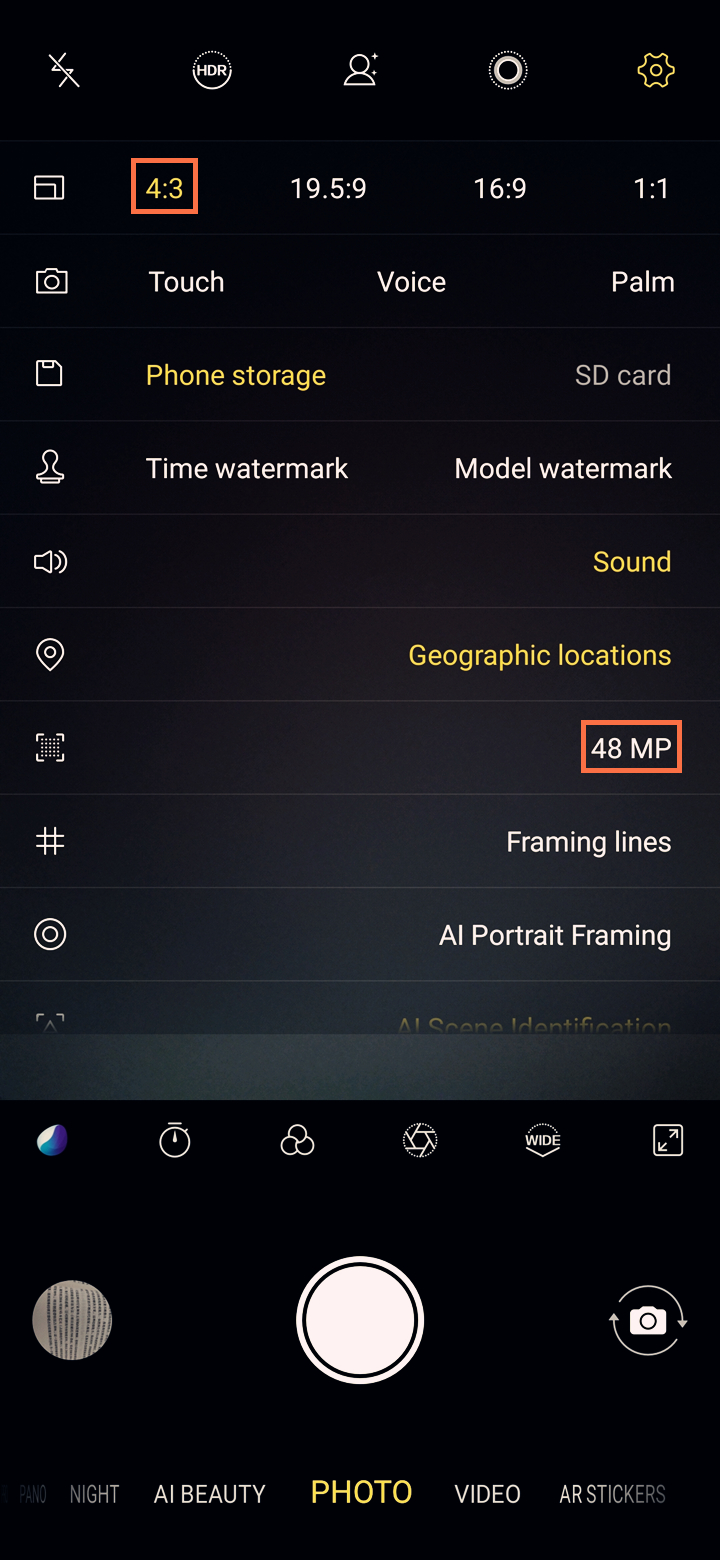
Why is the 48M option in Camera gray?
Thanks for your support. Please don`t worry, it is not an issue. The 48M Mode can only be enabled when selecting the “4:3” ratio. Please try to select “4:3”, then check again.
Why is there the dazzle light?
Please don`t worry, it is the common photography phenomenon. The general lens is composed of multiple lenses. Each lens has two reflective surfaces, so a lens will have more than a dozen reflective surfaces. The surface of the lens reflects about 5% of incident light. The more reflective surfaces, the more reflections and diffusions occur when light enters the lens. Therefore, the more complex the lens, the more the image quality will be affected, especially when shooting with backlighting or side backlighting. High-intensity light sources enter the lens so that multiple reflective surfaces interfere with each other and glare is easily formed. You can follow these steps to avoid it:
1. Clean the camera with dry cloth;
2. Adjust the shooting angle: Adjust the direction of the lens or light source to prevent the light source is too close to the lens or from the lens. Observe the glare changes in the frame, and then press the shutter until you feel satisfied;
I cannot turn on flash when I take photos. What should I do?
Please don`t worry, here are some helpful methods for you:
1. If the temperature is too low, it cannot be turned on. We suggest you warm your phone, then try to turn it on for a try;
2. Check if Flash is in Auto mode or OFF mode. If it is under Auto mode, it cannot be turned on if the light is sufficient when shooting;
3. The Flash mode cannot be used in Night mode, HDR mode and Ultra mode;
4. Reboot your phone and try again;
5. Clear the data of Camera;
6. Go to Settings>More settings>Back up & Reset>Restore(Reset) all settings, then try to turn on Flash. Please be assured, this operation will not wipe data on your phone.
If above measures are not effective, please seek help from our service center.
Why are there stripes when I take photos of the display screen?
The image on the screen is refreshed at a specific rate. Generally, it’s either 50 or 60 Hz. When the shutter speed is too short, there are probably stripes on the photo. You can enter Camera>Professional, adjust ISO to 100 or lower if your phone supports lower ISO adjustment, then take a photo for a try.
Why is there the virtual shadow?
When we take a photo of the light source, light enters the lens, and reaches the photographic plate. If the light source is High-intensity, it enter the lens so that multiple reflective surfaces interfere with each other and the virtual shadow is easily formed. You can follow these steps to avoid the virtual shadow phenomenon:
1. Clean the camera with dry cloth;
2. Adjust the shooting angle: Adjust the direction of the lens or light source to prevent the light source is too close to the lens or from the lens. Observe the glare changes in the frame, and then press the shutter until you feel satisfied;
Why are the photos taken in WIDE mode stretched?
Please don’t worry, distortion is a feature of wide-angle lenses, making it ideal for some scenes. It is normal, just like we use a fisheye lens to take pictures. You can get the effects you expect by adjusting the photographing angle, your pose and shooting distance. We will also continue to optimize the photo effects through algorithms, giving you a better experience.
Why does the video recorded when using the selfie stick have no sound?
For some of our phones, if the selfie stick has MIC module, the system will use the MIC module to record video sound by default (like we use headphones to record sound). If the MIC module of the selfie stick is broken or does not work, the sound will not be recorded. We recommended that you try using other selfie sticks or the selfie stick without MIC module. Thank you for your understanding and support.
Why can the flash not be turned on under Portrait mode?
Under Portrait mode, the depth of field information is very important. However, the light from flashlight can destroy the depth of field information. In order to achieve the great blurry effect, the flashlight is set to not be turned on under Portrait mode. Hope for your understanding.
Why can I not adjust exposure under Portrait mode?
Under Portrait mode, the depth of field information is very important. However, the exposure adjustment can destroy the depth of field information. In order to achieve the great blurry effect, the exposure is set to not be adjusted under Portrait mode. Hope for your understanding.
Why will Palm mode be turned off automatically after closing Camera?
Palm mode will consume the power while it is on. Furthermore, after using Palm mode, we might not use it again. Considering this and in order to save power, Palm mode is designed to be off automatically after closing Camera. Hope for your understanding.
Why can the photos taken by my phone not be saved?
Generally, if there is no enough space on your phone or SD card, or SD card is damaged, the photos cannot be saved. So, first of all, please make sure there is enough space and your SD card works well.
If the available space of your phone or SD card is sufficient and SD card can be recognized on other phones, but the issue still exists, please follow these steps for a try:
1. Upgrade your phone to the latest version;
2. Clear the data of Camera;
3. Access Settings>More settings>Backup & Reset>Restore(Reset) all settings. Don`t worry, no data or media will be deleted.
If above measures are not effective, please feel free to contact us.